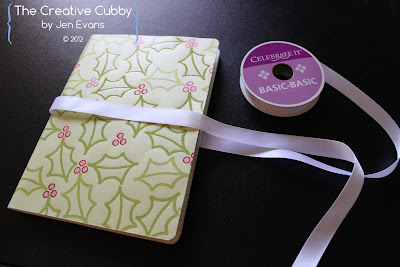
'Tis the season... to lose your mind!!! Let's be honest, the holidays are hectic - fun but hectic. To be the perfect Santa's little helper, you need to get organized. I put together this easy and inexpensive Christmas Planner -with {free} printables - to get all us little elves in line. This project took less than $10 and under an hour to make. That's right - no huge commitment to get everything in a row. Here's what you need...
Materials
Composition Notebook
Scrapbook Paper
Glue Dots
Double-Sided Tape
Stickers
Circle Punch
Ribbon
Scissors
Paper Cutter
Permanent Marker
Distressing Ink
Pencil
Ruler
2 Envelopes
Instructions
1. Measure your composition notebook on your scrapbook paper. Mine happened to be 12" exactly when unfolded. Cut and adhere to your cover with glue dots. Uses scissors to trim rounded edges.
2. Attach ribbon to front of book so you can tie your organizer closed. Measure ribbon, giving an extra 8 inches on tails from edge of book, and cut. Use a pencil and ruler to measure the middle of your cover, placing a mark on each edge of the cover, front and back. Place glue dots directly over pencil markings and wrap ribbon.
3. Cut rectangles with paper cutter from scrapbook paper and adhere with double-sided tape.
4. Create cover label and adhere. Embellish the cover with any additional decorations you would like. You'll notice in my finished picture I added ribbon, snowflakes and rhinestones.
5. Use two envelopes to create Coupon and Receipt pockets. Adhere to inside covers of planner with double-sided tape.
6. Create tabs for your dividers. I used five categories. Calendar, To-Do, The List (Gifts), Menu, and Cards. Cut scrapbook paper into 1.5"x1.5" squares and fold in half. Label - remember to mark close to the fold! Figure out how many pages you want in each section. Attach to pages using double-sided tape on the first page of each section.
8. Print calendar pages and additional organizing pages {below} and adhere to composition notebook pages using double-sided tape. The additional pages include a 25 Days of Christmas organizer, Numbered Christmas Card list (so you know how many you need to buy) and menu planning sheets.
Now get to work!!! It's the holidays - what are you sitting around for?!


bape clothing
ReplyDeletegolden goose
off white nike
golden goose sneaker
kyrie irving shoes
off white
alexander mcqueen
supreme
goyard
bape sta